
How to directly onboard Windows Server to MDE and activate MDI functionality with just few clicks
- Vlad Johansen

- Mar 13, 2025
- 3 min read
Updated: Jul 30, 2025
If you already have a domain controller with AD DS, CS, or FS roles onboarded in MDE, you can simply onboard MDI sensors with a few clicks from the Identity section in Defender, without the need to install them manually.
Prerequisites:
Defender for Business for Servers license or
Defender for Endpoint for Servers or Defender for Servers P1 or P2
Requirements:
Windows Server 2019 OS or later and
Server is onboarded to Defender for Endpoint via one of the methods described earlier
Here is a 2019 Windows server with AD DS role, which we will onboard to MDE, because we don't have any new servers onboarded without MDI sensors. Let's show you how to onboard server to Defender for Endpoint first and how to activate MDI with just few clicks.
Go to Settings -> Endpoints -> Onboarding
Choose your Windows Server version , in my case i have an Windows Server 2019
Choose between Standard and Streamlined Connectivity type
Difference between Standard and Streamlined
Standard Connectivity
URL Configuration: Requires a more extensive list of URLs to be configured for network connectivity.
Granular Management: Each service within Defender for Endpoint needs to be individually managed and updated.
Legacy Support: Suitable for environments that rely on older network devices without hostname resolution or wildcard support.
Streamlined Connectivity
Simplified URL Set: Reduces the number of URLs needed by consolidating them into a single domain: *.endpoint.security.microsoft.com
Static IP Ranges: Offers the option to use dedicated static IP ranges instead of URLs, simplifying network configuration
Easier Management: Future services will be automatically included under the simplified domain, reducing the need for frequent updates
Enhanced Support: Supports newer network configurations and is designed to be more adaptable to modern network environments
4. We will choose direct onboarding with Streamlined method and proceed
5. Under Deployment method we will choose Local Script
6. Download onboarding package and send your zip file to your server

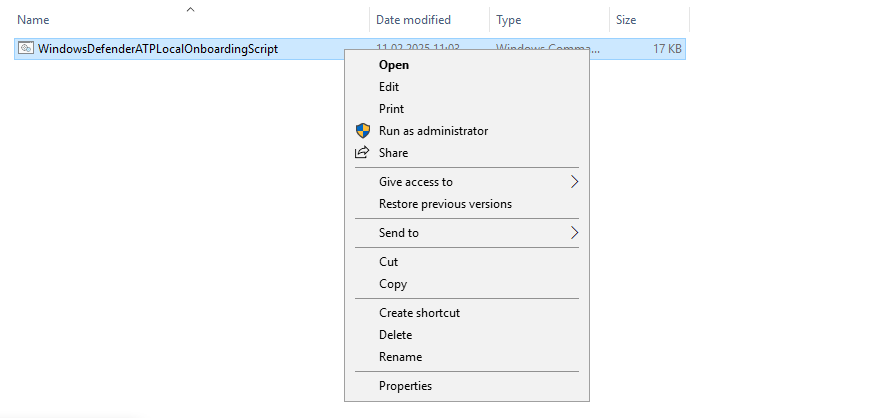
7. Now, lets unzip and run our script as administrator on server
8. Now our server is succesfully onboarded to MDE

9. Let's check Assets -> Devices and see if we find our onboarded server in the list

10. BIngo! After just a few minutes and an refresh we are now able to see our server in the list with healthy sensor and in Onboarded state

11. Now let's go to Settings -> Identities. If you haven't onboarded this services before, you'll be met with a onboarded message. In my case I finished this before and have already onboarded my DC01 manually
12. Let's press Add Sensor and see what which options we get now

13. Press Activate servers, check servername and press Activate twice


14. Done. We have successfully activated sensor on DC02

15. Now , if we click on "Click here to see the activated servers" we can see our DC02 appearing in the list with status "Unhealthy" and "Onboarding"

16. After about 15 minutes the status have changed to "Healthy" and "Running"

Yeah, my DC01 have some health issues, never mind :) After checking this i found some problems with DNS, missing updates, advanced auditing in GPO ++.

Don't forget to setup health issues notifications, to don't miss any messages about errors on your sensors :)

Read my previous blog post for more information on how to setup MDI sensors manually if you earlier Windows Server OS here:
https://www.need4.cloud/post/protect-your-on-premises-identites-with-defender-for-identity-mdi
Thanks for reading and have a nice day.


Comments